
Invoices and Receipts
How It Works
Invoicing and Receipts
Watch this 2-minute video for a quick overview of invoices and receipts.
Invoices
There are two steps you need to complete before you are able to create and send your first invoice.
Step 1: Click Main Menu > Invoices / Receipts > Customer List to set up your customer’s contact information, email address, whether you will email or mail the invoice, and the invoice terms of payment, i.e., Net 15 or 30 days.

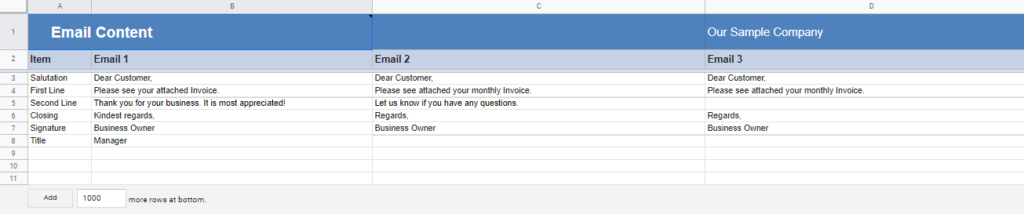
Step 2: Click Main Menu > Invoices / Receipts > Email Content to set up the email content that will accompany the invoice if and when it is emailed. There are 3 different email messages you can set up in the Email Content sheet.
Step 3: Click Create Invoice to see this:
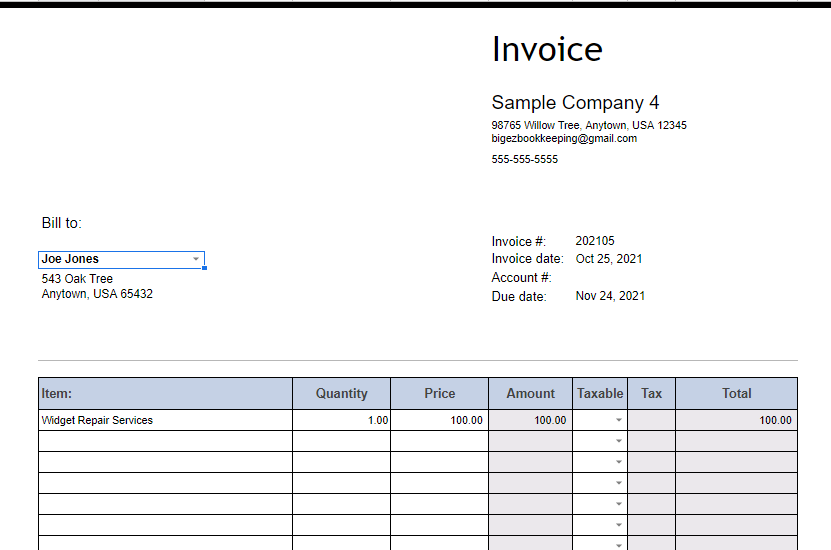
To place a logo on your invoices, copy and paste your logo .jpg or .png image file into cell B5.
Select a customer from the dropdown on row 13 and the top portion will autofill. Then enter the billable line items.

When you are through preparing the invoice, click Send Invoice, confirm the email address is correct, and click Yes.
Your invoice will be emailed to your customer and a PDF copy will be listed in the Invoice History sheet.
As you receive payments, go back into the Invoice History and change the status to Paid. This will allow you to see which invoices are still unpaid and will adjust the Total Due on the top row.
Receipts (not available in forever-free invoicing tool)
Set up each customer or donor you would like to send receipts to as a Subcategory (for example, Donations Received – Donor Name). Then select a period (one month or all) and a customer/donor name from the dropdown. The Receipt sheet will filter all of the transactions for that specific Subcategory name.
This sheet is used to provide proof of payments received from a specific customer or donor. You may wish to include a message in cell C1 before printing or generating a PDF. To print, click File > Print > Scale, then use the dropdown menu to choose Fit to Page.