8 Simple Tips to Customize Big E-Z Books
Our accounting software is so easy because we use spreadsheets. They are programmed to allow just the right amount of customization and everything else is locked down to keep its integrity. What could be easier than entering transactions in columns and rows?
1 – Choosing Your Business Expense Categories
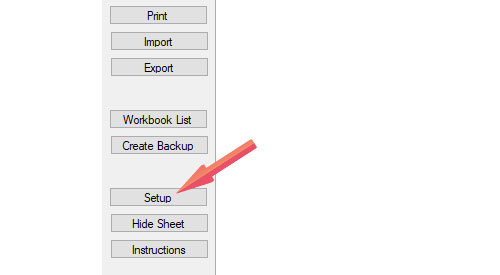
Step 1: Start by opening Big E-Z Books and clicking on Setup from the left menu.
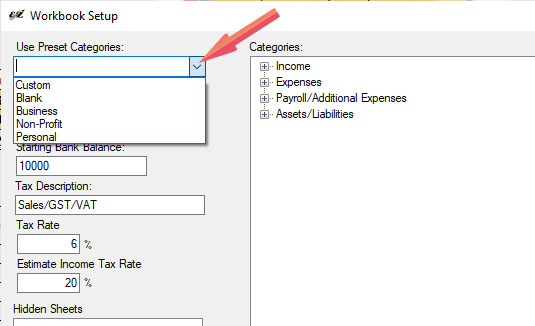
Step 2: Click the down arrow and select which title best serves your needs Business, Non-Profit or Personal.
Step 3: In the Categories box, click the plus sign next to Expenses. The list of expense account categories will show up:
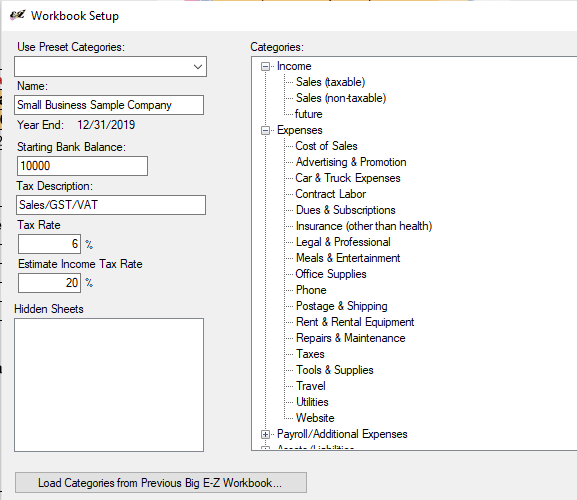
Step 4: Double-click on any income or expense category to open and edit it.
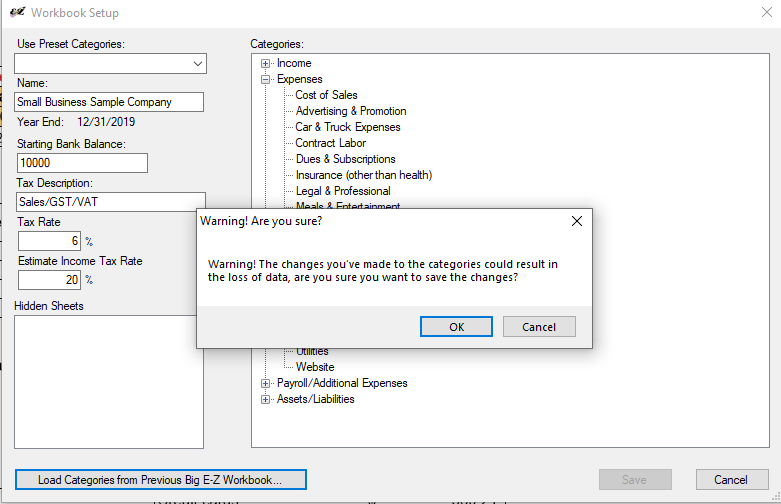
Step 5: Click on Save and then OK to the warning message:
The expense categories should now be listed in the Checks spreadsheet for the first period and will populate throughout all the months and all the accounting reports. Most of these categories are the same allowable expenses you would find on the tax return. Using our preset categories to keep your records this year would give you summary totals to use for tax-time reporting.
2 – Choosing a Name for Your Workbook
Choose a name for your workbook that is meaningful to you. This name will be listed on all your reports throughout the system. Keep in mind that you can always change the name at a later time by right-clicking on your workbook name from the Workbook List.
3 – Entering Your Beginning Balance
Enter your starting bank balance from the end of your previous year either on the Setup screen or on the first-period Checks in column H, row 2. This should be your true bank account balance after deducting all checks written as of the end of the year.
4 – Changing the Tax Rate
If you track Sales tax, you will want to change the tax rate on the Setup screen or on the first-period Deposits ledger sheet on column K, row 5. If you don’t collect sales tax change the rate to zero and start entering your income category titles on column L.
5 – Balance Sheet
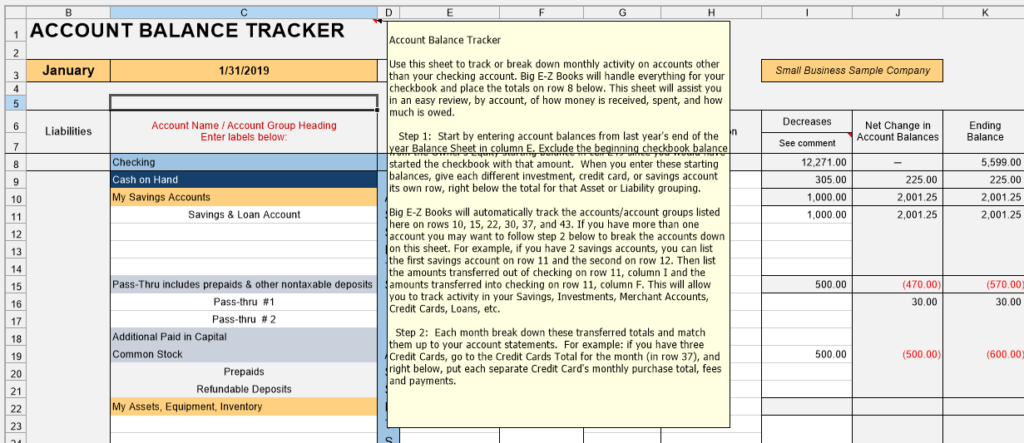
If you plan to use the Balance Sheet you will want to open the Account Balance Tracker in the first period. Then set up account names in column C and beginning balances in column E. The ending balances on the ABT will show up on the Balance Sheet. Hover over the C 1 cell to view the instructions on how to use the Account Balance Tracker.
6 – Budget
If you plan to use a Budget you’ll want to set up the Budget by clicking on Summary from the left menu and then click the Budget tab and follow the instructions in the F1 cell.
7 – Mileage
To track mileage you will want to start the system with the odometer reading from your car at the beginning of the year. See instructions on the first-period Cash&Charges ledger sheet in column AN, row 3.
8 – Subcategories and Cost Centers
If you need to track more detailed categories than what the Main categories provide you can use the Subcategory Section. Go to the first-period Deposits ledger sheet and scroll to the right until you reach the purple section. In the Deposits ledger sheet go to column AO and AX on the Checks ledger sheet to begin entering subcategories. Follow the instructions on found in column AX, row 1.
There are many uses for the 100 subcategories columns in both the Deposits and Checks ledgers. You can track payments to or from individuals by assigning their names to the columns.
