5 E-Z Steps to Keep Your Monthly Bookkeeping Up-to-Date
Big E-Z Books uses Excel type sheets to record income and expenses into rows and columns which makes bookkeeping super easy and saves you time. You only enter your checkbook transactions once but Big E-Z Books doubles the entry automatically and establishes the checks and balances needed behind the scenes to give you accurate accounting reports you can trust.
Step 1. Enter Your Financial Data
Follow the instructions at the above link to enter all your checking account transactions.
Now that you have your financial data entered keep in mind that if you are using the importer you are reflecting exactly what the bank has on record for your account. If the bank makes a mistake (which they sometimes do) you won’t necessarily catch it. And the bank will not have any outstanding deposits or checks you’ve written. So if using the importer, adjust for recent checks and deposits that have not made it to the bank yet. This will give you a true accounting of your activity for the month.
Step 2. Reconcile the Checkbook
Near the beginning of each month, you’ll want to reconcile the checkbook. Click Bank Reconciliation.

Hover over cell D 1 to see instructions.
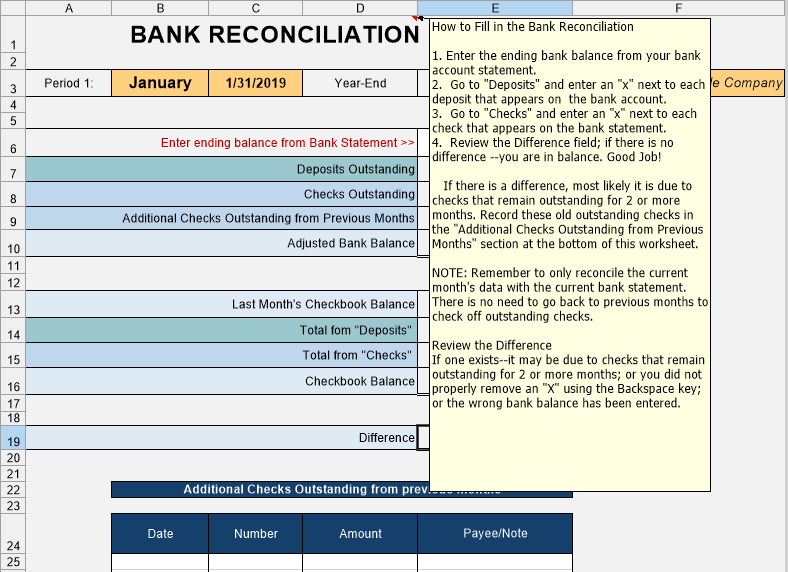
Follow the instructions in cell D 1 to prove your records are accurate.

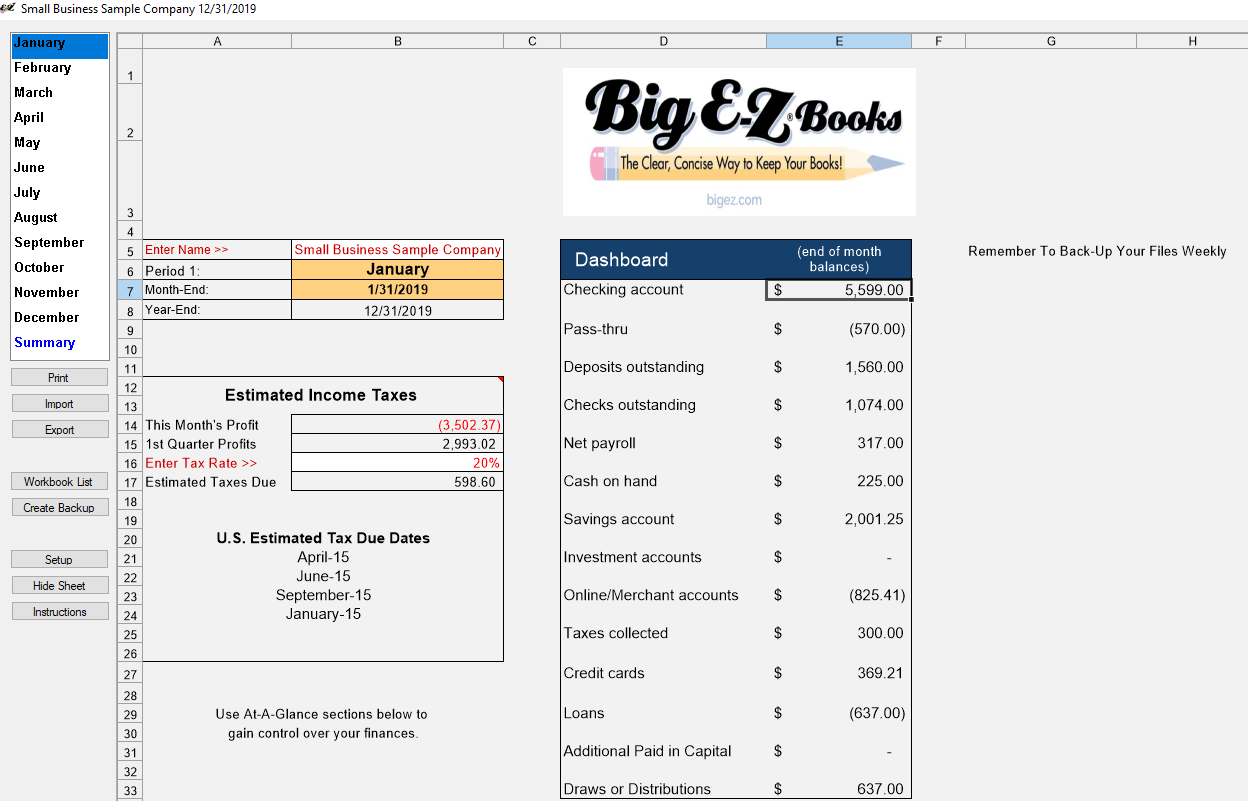
Step 3. Check the Accuracy of Your Accounting Reports
View the Dashboard to verify your Checking account total is the same as Checkbook Balance on the Bank Reconciliation and Checks.
View the Income & Expenses Report to compare budget amounts to actual amounts. Make sure your profit figure matches in both D 51 and D 77. View the At-A-Glance sections to keep track of important account balances. Pay your sales and estimated income taxes, if necessary. Print and store reports if you would like to keep a hard copy of your work. NOTE: Keep in mind that the ledger sheets are extremely wide so you’ll want to highlight and print just the area you need to print.
Step 4. Back Up Your Files
There are two ways to back up your files. 1) From the Workbook List by right-clicking on a name and navigating to a location to save your backup. 2) From the left-side menu, click Create Backup.

Step 5. Send Accounting Reports
At this point you can send your monthly accounting reports to an accountant, a tax
preparer, or colleagues by clicking Export.